How to setup fastai on Windows 10
As I mentioned in the first post, I have recently started going through the fast.ai course Practical Deep Learning for Coders. The course instructor Jeremy Howards, highly recommends using a cloud GPU instance like AWS, GCP etc. to practice and train your networks.
I followed the same instructions and setup everything on GCP (Google Cloud Platform). And actually finished the first lecture on GCP. GCP provides you with $300 of free credit for the first year which is more than enough for the course. It's actually calculated roughly and shown here.
Difficult to Work in Cloud All the Time #
But soon enough I realized that my schedule and work style is not suitable for such systems. I often drift to doing something else while watching a course video. Like playing a round of Clash of Clans or sneakily watching whatever my wife is binging on Netflix or just going down the rabbit hole of Googling.
Meanwhile the cloud VM instance keeps on running with per minute billing.
There is enough free credit to cover that. But I'd like to use it when I actually need it.
Setting up Windows 10 for the course #
Also as Jeremy points out in the first lecture itself that deep learning is so easy to do now because reinforcement learning. That is you do not need to train your network from scratch. You can take a pre-trained network meant for generic stuff and train it with your small sized niche data and call it a day. A cloud VM instance with crazy good configuration might not always be required for that.
Especially when I have a decent workstation at home with Ryzen 5 1600 with 16 gigs of RAM and Nvidia GTX 1050Ti (4GB).
I mean it is not even the 10th system configuration people will list out as a capable neural network work system, but it can do it's job in my case.
So, I went ahead and started making my Windows 10 system ready for the course. There were some useful discussions on the topic on the course website, but none of it worked exactly for me.
Here's what worked for me...
Update Nvidia Drivers #
Before starting to install anything, update your Nvidia drivers. And stick to Windows update for this instead of updating from the GeForce Experience program or downloading driver from Nvidia website. I had issues with last two every time. With Windows update you might not get latest drivers, but you'll have something stable that work well with Windows.
The easiest way to go about this is to open Device Manager and uninstall the Nvidia drivers from the Display Adaptors section.
Restart.
Open Windows update and check for updates if the drivers are not automatically installed while rebooting. Nvidia drivers update should be listed just follow standard Windows update procedure to install those.
Install fastai Using Anaconda/Miniconda #
Installing fastai environment using conda package management system will be the easiest way to do it. You can choose Anaconda (installs a relatively large number of packages) or Miniconda (smaller and minimal).
I went with Miniconda when I used conda environment. The steps are as follows:
-
Install Miniconda. Installers are available here
-
Once the installation is done, update conda using
conda update conda -
Install
pytorchandfastaiconda install -c pytorch -c fastai fastai -
Install Jupyter
conda install jupyter
And that's all you can go on and start downloading course materials and running notebooks.
Install fastai Using Nothing but Pip #
I have never been very comfortable using conda environments. Possibly because I love to have granular control over what package I install and which one I skip.
Also it is a pain to always work from conda environment. It's good enough if your only requirement is to learn about data analysis or deep learning etc. as the conda package management has been built around to serve purposes like that. But I feel more comfortable with having the capability to run Python from anywhere.
Anyway, soon after setting this environment, I wanted to use mplfinance package for some financial data analysis. To my surprise I could not install it as apparently it is not available in any conda channels. I can install it easily using pip but couldn't make that work under conda environment as well.
Eventually I uninstalled Miniconda and everything related to it, and setup everything from scratch using just pip
So, here's how you do that...
-
Install Python. Duh! Installers available here. Note: You must install 64 bit version, otherwise there will be problem with installing
pytorchlater. -
Open PowerShell as administrator ( + x, i). This way everything will be always ready whichever environment you work from (CMD, PowerShell, VS Code etc. etc.)
-
Upgrade
pipand installwheel(might not be required, but no harm in doing it)python -m pip install --upgrade pip
python -m pip install --upgrade pip setuptools wheel -
Identify your CUDA version. This is required to install proper version of
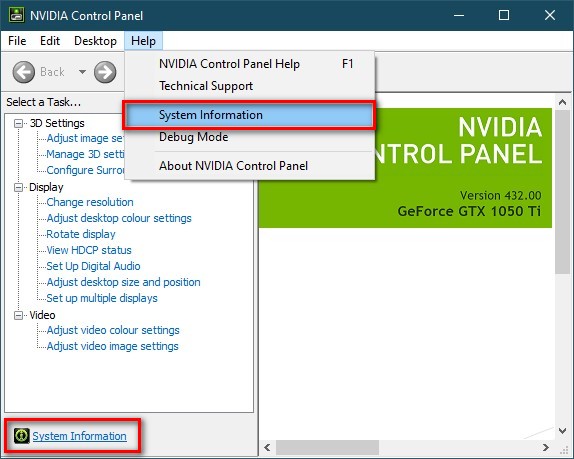
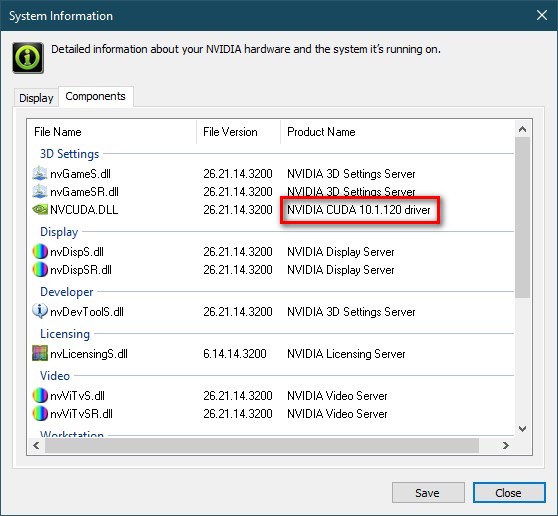
pytorch. To do this go to Nvidia settings from you system tray icons. And click on System Information.
- Note your CUDA version. As shown in the screenshot below, it is 10.1 for me.
-
Install
pytorchby selecting your system details and configurations here. The command should look something like this...pip install torch==1.5.0+cu101 torchvision==0.6.0+cu101 -f https://download.pytorch.org/whl/torch_stable.html -
If you get errors like below, you might have selected a wrong combo. Confirm that you have 64 bit Python installed.
ERROR: Could not find a version that satisfies the requirement torch==1.5.0+cu101 (from versions: 0.1.2, 0.1.2.post1, 0.1.2.post2)ERROR: No matching distribution found for torch==1.5.0+cu101 -
If you still cannot make it work, try downloading required wheel package from here. But this should be your last resort.
-
Install
fastaiandjupyterpip install fastai
pip install jupyterlab
Start Learning #
By now everything that is required to run the course notebooks should be installed and ready. You can confirm that by running
jupyter notebookThis should open up the notebook in your browser.
Let's go ahead and start the actual course notebooks.
-
If you haven't done it already, clone the git repo of the course
git clone https://github.com/fastai/course-v3 -
Navigate to the particular course directory and start Jupyter notebook
cd course-v3/nbs/dl1
jupyter notebook -
That's all. You should now be able to run all fastai course notebooks locally in your Windows 10 machine without any issues.
How to check if torch is actually using GPU #
Launch a Jupyter notebook, and try running these short snippets to check how much time it is taking to run on CPU and how much GPU.
Measure CPU time
import torch
t_cpu = torch.rand(500,500,500)
%timeit t_cpu @ t_cpu
This should output something like below (on my AMD Ryzen 5 1600)
1.12 s ± 51.6 ms per loop (mean ± std. dev. of 7 runs, 1 loop each)Now try to run the same but using CUDA cores
t_gpu = torch.rand(500,500,500).cuda()
%timeit t_gpu @ t_gpu
You should either get some error, which might mean something wrong with you installation, or output like below
99.7 µs ± 15.3 µs per loop (mean ± std. dev. of 7 runs, 1 loop each)That's almost 11.2k times faster! Definitely torch is using my GPU.
In comparison, my GCP instance with a Nvidia tesla T4 (16 GB) took 387 ms on CPU and 35.6 µs on GPU. However, note that this difference will be much larger with actual training times. For example, for lesson 1, cat-dog classification, my local machine took almost 10 minutes to fit one cycle, whereas the GCP instance was just shy of 2 minutes. And this will only increase with larger training data.
If you are familiar with pytorch, by this point you might be thinking there are many other simpler ways to check if GPU is being used.
True.
You could've simply run this to check if CUDA is available
torch.cuda.is_available()But that's not half as much as fun as getting actual numbers and feeling good about it!
I mean my puny GTX 1050ti is 11,200 times faster than my CPU!
Who doesn't need such number is their life!